


Chrome Clear Headlights Assembly For GMC Sierra 1500 2500HD 3500HD 2007-2014 B
$92.88
SKU: C116-099-B
Free & Fast Shipping
Secure & Trusted Trade
Feature:
1.A new pair of headlights from ours allow you to see the road in front of you clearly during the night and in any bad weather
that may arise.
2.Gives you and your family safer nighttime driving.
3.Makes your car looks newer.
4.See road markings and traffic sighs better.
5.Driving at night can be a scary proposition - and it's even scarier if you can't see the road well.
6.A dim, cloudy, yellowed, or otherwise damaged or non-functioning headlight makes driving dangerous,not only is your own
safety at risk, but the safety of others is as well.
7.Great Replacement or upgrade for factory headlights
8.Adjustment screws for high/low beam
Specifics:
Condition: 100% Brand New
Color: Chrome Housing Clear Lens
Material: Plastic Housing / Polycarbonate Lens
Fitment Type:Direct Replacement
Placement on Vehicle:Front, Left, Right
Manufacturer Part Number: GM2502283, 2007, 2008, 2009, 2010, 2011, 2012, 2013, 2014
Interchange Part Number:22853029, 25799193, 22853030, 25799194
Other Part Number:22853029, 25799193, 22853030, 25799194
Assembly Type:Composite
Housing Color:Chrome
Lens Color:Clear
Lighting Technology:Halogen
Fitment:
For GMC Sierra 1500 2007-2013
For GMC Sierra 2500 HD 2007-2014
For GMC Sierra 3500 HD 2007-2014
Package Include:
1 Pair of Headlights (Driver & Passenger Side)
Note:
1.Please check whether this item can fit on your car before purchasing.
2.Before you begin to adjust the light, make sure check the alignment of your lights first. Park the vehicle about 10 to 25 feet from the wall with the lights aimed at the wall. The centerlines of the headlights should not be any higher than 3.5 feet above the ground.
TIPS:
②.Installation:
1.Undo the screws, clips, or retainer springs that hold the headlight in place.
2.Disconnect the wiring from the assembly.
3.Detach the headlight from the vehicle to replace it with a new one.
4.Fit in the new headlight assembly.
5.Fix the new headlight into place and make sure that the screws, clips, or retainer springs used are sealed.
6.Reconnect the wiring that was unplugged from the assembly.
7.Put back the grille and other components that you removed. Seal them back into place.
8.Test the new assembly.
②.Adjustment:
Before you begin to adjust the light, make sure check the alignment of your lights first. Park the vehicle about 10 to 25 feet
from the wall with the lights aimed at the wall. The center lines of the headlights should not be any higher than 3.5 feet above
the ground.
1. Find the adjustment screws. Firstly, locate the adjustment screws on your vehicle.
2. Adjust the headlight individually. The headlights should be adjusted one at a time. Put a rag or towel
over a chair in front of the light you want to block. Covering the light assembly directly can damage the plastic lens.
3. Adjust the vertical field. The screw on the top of the light housing should be turned clockwise to raise the
lights and counterclockwise will lower the light. The headlight should be adjusted until the top of the most intense part of the
light beam shines directly on or just below the center of the tape line on the wall.
4. Test your results
③.Adjustment:
Condensation buildup inside a headlight assembly is normal, and it occurs for a number of reasons.Condensation does not mean
that a headlight assembly is defective,After hot, pressurized air has worked its way out of the headlight through the vents, humidity
can get drawn in from the outside. So, headlights that have been on during hours of driving become fogged on the inside because
their cool temperature creates a low-pressure area that actually draws moisture in.To minimize condensation buildup inside the
headlight, make sure any dust boots or covers are on tightly. Also make sure that the headlight vents are not blocked, which could
prevent condensation from escaping.
If water collects inside your headlight to the point where puddles form, odds are you've got a crack in the headlight lens cover. Water
can also leak in because of improper seals around dust boots where bulbs are inserted. If no cracks or holes are visible around the
edges of the headlight, the problem could be the housing itself. If you can visibly locate a crack, it's best to repair it with sealant.
Fit well
I am very please with the products, it fitted my vehicle and i can finally have the none working light fixed and litted. I recommend
Best price
Fairly easy to install, very simple to wire. Hooked up to running lights and works flawlessly. Works great.
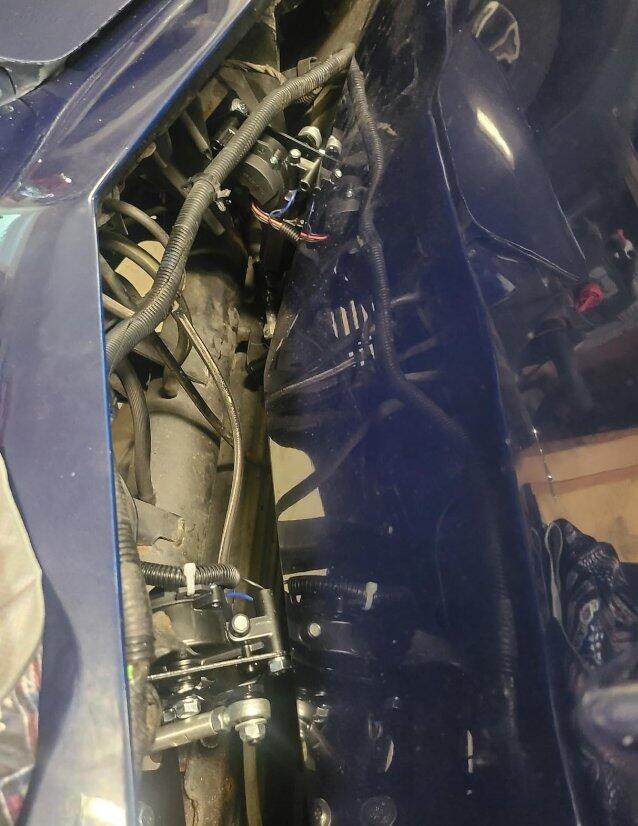
Overall product works great. Love the instant response now when the lights are flipped on and no more winking! As others noted, was disappointed to find there are no instructions with these units. Although they are plug and play, does take a little thought to install properly. Below are a couple helpful hints for the install.
1. Removing the old actuator relays make room to mount new relay and fuse with existing screws and mount holes.
2. You will need to remove a portion of the old mount bracket to install the new actuator, but it can be cut fairly easy with a multi tool with metal blade. The new until has a strong enough base plate to reinforce. Be sure to reinstall factory support brackets as well.
3. The new actuators are not labeled clearly. There is an R and L at the end of the model number. I assume they mean Right and Left, but if this is the case, the R goes on the right side of the car when you are standing in front facing toward rear of car, not when you are sitting in the car facing forward.
4. The new units come with 4 bolts, washer and nut sets. Two bolts are fixed and two are removable/reversible. I recommend putting the units with two fixed bolts and hand tightening the nut assembly. Due to lack of room and position of brackets on back of factory mount, I recommend installing the other two bolts from the underside and nut assembly on the actuator side. This makes it much easier to get the nut assembly on. The final product isn’t quite as clean, but I cut the bolts flush with nuts and painted black. You wouldn’t notice unless pointed out. Certainly beats driving yourself crazy trying to get the nut assembly on the other way.
5. Finding the correct wiring configuration is crucial to get them to operate correctly. I utilized the ground in front of car for black wire, ran red power wire to positive connection on alternator. The blue remote wire is the tricky one. I fed through the firewall and connected to the power supply that feeds the high/low dimmer. On the 77 Vette, this can be found at the base of the steering column on left side. Once you remove the cover, look for a quick connector that ties into a green switch. Note, when you pull the lever on column to switch high/low beam lights, you will see a push rod that activates this green switch. On the quick connector, there are three wires, a tan wire that powers the low beam bulbs, a green wire that powers both the low and high beam bulbs and a light blue wire. This light blue wire is the power feed from the on/off switch on the console. Make the tie in to this blue wire, this way the lights will pop up when lights are turned on and you will be able to switch between high and low beams while driving. This also gives you the ability to use the running lights without the headlights popping up.
Overall, took me a little under three hours to install, but could have gone faster if I had know some of the info above.