


2011-2013 BMW 535i xDrive Ballast Xénon Ampoule Module LED Diode Kit Droite 63117271902 63117318327 Générique
€99,88
SKU: C116-213-B~002
Livraison rapide et gratuite
Transactions sécurisées et fiables
Caractéristique :
1 : Selon les spécifications d'origine, correspond parfaitement à la voiture d'origine.
2 : Posséder différentes machines de test pour concevoir des paramètres exacts et précis pour nos produits. Tous les articles ont été testés pour leurs performances.
3 : Fabriqué avec des matériaux de haute qualité, léger, antirouille, inaltérable et durable.
4 : Produit de rechange de qualité supérieure.
5 : Performance stable, haute fiabilité, adapté pour remplacer votre pièce cassée.
Spécificités :
État : 100 % neuf
Matériau : Métal
Couleur : comme les images
Numéro de pièce du fabricant : 63117271902
Numéro de pièce d'échange : 63117318327 / 63117316217, 7271903 7217509 7262731 7316217 7318327, 63-11-7-316-217 63-11-7-318-327, 63217217509 63127262731 63117271899, 63117271904
Autre numéro de pièce : 63117274400 / 63117267044 / 63117318327, 7 296 090 / 63127296090 / 7296090, 63117237644 / 7237644 / 63 11 723 76 44, 63117317408 / 7317408 / W003T20071, W003T23171 / W003T19571, 63127262731, 63117271902, 63117318327, 7271902 7217509 7262731 7316217 7318327, 63117237647 / 7237647 / 63117316217, 63117305235 / 63117304905 / 63117279625
Type : Ensemble de phares
Code de forme d'ampoule : D1S
Ampoules incluses : Oui
Ballast inclus : Oui
Technologie d'éclairage : Xénon
Placement sur le véhicule : Avant, Droit
Type de montage : Remplacement direct
**Remarque : Ne convient pas aux modèles GT.
Compatibilité :
Pour BMW 528i 2011-2013
Pour BMW 528i xDrive 2012-2013
Pour BMW 535i xDrive 2011-2013
Pour BMW 550i xDrive 2011-2013
Pour BMW ActiveHybrid 5 2012-2013
Pour BMW M5 2013
Le forfait comprend :
Ballast xénon (63117237647) - 1 pc.
Module de commande (63117316217) - 1 pc.
Diode de clignotant côté droit (63117271902) - 1 pc.
Feux Angel Eyes (63127262731) - 2 pcs.
Ampoule xénon D1S (63217217509) - 1 pc.
Informations sur la livraison :
Délai de livraison : 3-7 jours ouvrables.
Livraison rapide gratuite.
Customer Reviews
Fairly easy to install, very simple to wire. Hooked up to running lights and works flawlessly. Works great.
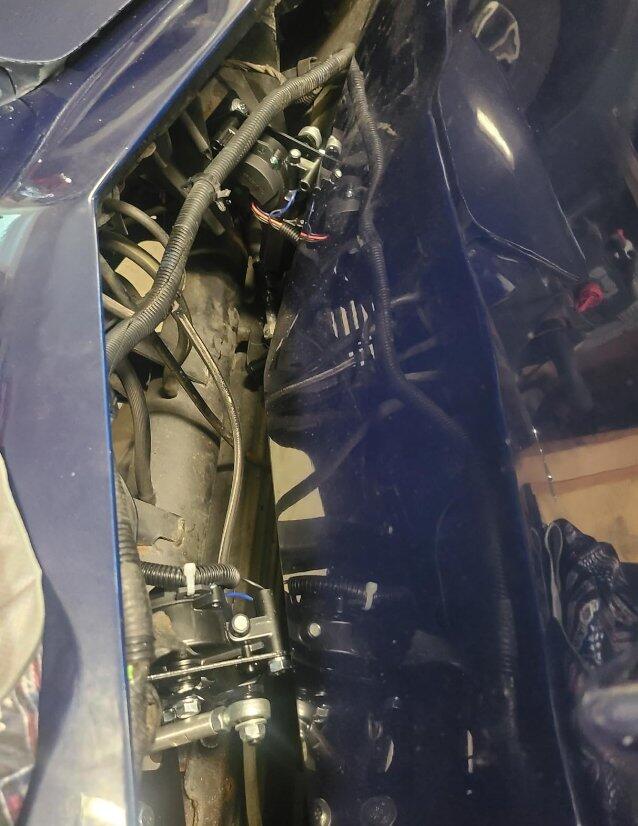
Overall product works great. Love the instant response now when the lights are flipped on and no more winking! As others noted, was disappointed to find there are no instructions with these units. Although they are plug and play, does take a little thought to install properly. Below are a couple helpful hints for the install.
1. Removing the old actuator relays make room to mount new relay and fuse with existing screws and mount holes.
2. You will need to remove a portion of the old mount bracket to install the new actuator, but it can be cut fairly easy with a multi tool with metal blade. The new until has a strong enough base plate to reinforce. Be sure to reinstall factory support brackets as well.
3. The new actuators are not labeled clearly. There is an R and L at the end of the model number. I assume they mean Right and Left, but if this is the case, the R goes on the right side of the car when you are standing in front facing toward rear of car, not when you are sitting in the car facing forward.
4. The new units come with 4 bolts, washer and nut sets. Two bolts are fixed and two are removable/reversible. I recommend putting the units with two fixed bolts and hand tightening the nut assembly. Due to lack of room and position of brackets on back of factory mount, I recommend installing the other two bolts from the underside and nut assembly on the actuator side. This makes it much easier to get the nut assembly on. The final product isn’t quite as clean, but I cut the bolts flush with nuts and painted black. You wouldn’t notice unless pointed out. Certainly beats driving yourself crazy trying to get the nut assembly on the other way.
5. Finding the correct wiring configuration is crucial to get them to operate correctly. I utilized the ground in front of car for black wire, ran red power wire to positive connection on alternator. The blue remote wire is the tricky one. I fed through the firewall and connected to the power supply that feeds the high/low dimmer. On the 77 Vette, this can be found at the base of the steering column on left side. Once you remove the cover, look for a quick connector that ties into a green switch. Note, when you pull the lever on column to switch high/low beam lights, you will see a push rod that activates this green switch. On the quick connector, there are three wires, a tan wire that powers the low beam bulbs, a green wire that powers both the low and high beam bulbs and a light blue wire. This light blue wire is the power feed from the on/off switch on the console. Make the tie in to this blue wire, this way the lights will pop up when lights are turned on and you will be able to switch between high and low beams while driving. This also gives you the ability to use the running lights without the headlights popping up.
Overall, took me a little under three hours to install, but could have gone faster if I had know some of the info above.
Installation was simple, and the quality is top-notch. Highly recommend!
Quick shipping, easy installation, and now my car has a sleeker look with better visibility on the road. Great buy!
Witnessing those emblematic headlights respond to electric power injected new vitality into my car, infusing it with a touch of contemporary elegance while preserving its timeless charm. Great!